Retired Document
Important: This document has been replaced by App Distribution Guide. App Distribution Guide offers step-by-step instructions for configuring, testing, and submitting your app for approval. This new document describes how to use Xcode and other Apple developer tools to create and configure your project, request signing certificates, create provisioning profiles, configure special App Store technologies, test your app on devices, create your app record in iTunes Connect, and submit your app for approval to Apple. If you have a company Apple Developer Program membership, you’ll also learn how to manage your team’s certificates and provisioning assets.
Adding a Device ID to Your Development Team
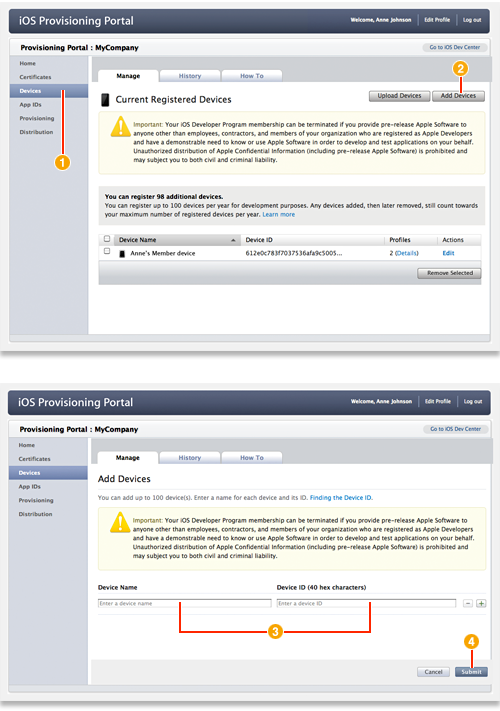
After logging in to the iOS Provisioning Portal, click Devices in the sidebar.
Click Add Devices.
Enter a device name and the device ID.
Click Submit.
Make an iOS device available to your team for development and testing by adding it in the iOS Provisioning Portal.

Only team admins can add devices. A member who wants to add a device needs to send the device ID (UDID) for that device to a team admin.
A development team can add up to 100 devices to the team each membership year. Once a device is added, your team cannot regain that slot even if the admin removes the device. Removing a device does not alter the remaining number of devices your team can add.
After a device is added, the device ID must be added to a development provisioning profile before you can run an app on that device.
Copyright © 2013 Apple Inc. All Rights Reserved. Terms of Use | Privacy Policy | Updated: 2013-04-23