Retired Document
Important: This document may not represent best practices for current development. Links to downloads and other resources may no longer be valid.
Customizing for Different Regions
Xcode lets you create applications, bundles, and frameworks that are customized for different regions. Generally, you’ll start by creating a variant for one particular region, called the development region, and add more variants later.
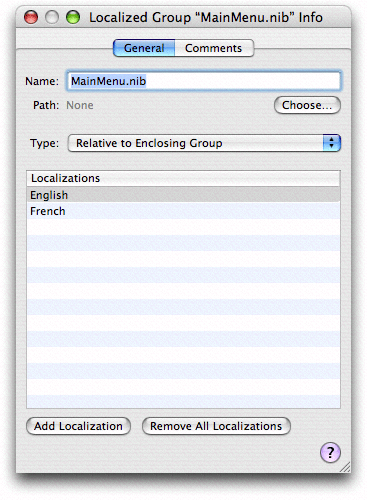
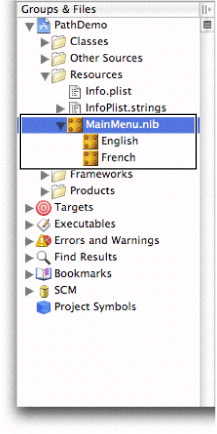
In the Groups & Files list, a file customized for different regions appears as a localized group, which has a file icon with a triangle beside it. To see the file’s variants, click the triangle. To add and remove variants, select the localized group, open the inspector window, and use the two buttons at the bottom of the General pane, as shown in the following figure.

For more information on localizing your product for different regions, see Internationalization and Localization Guide.
Marking Files for Localization
To mark files for localization, select the files, open the
inspector, and click the Make File Localizable button. Xcode moves
the files into the development region's .lproj folder.
If a file was already in another .lproj folder,
Xcode copies it to the development region’s .lproj folder.
Xcode creates a localized group in the Groups & Files list, with the file’s name and icon. To view the individual localization variants, click the disclosure triangle next to the localized group icon. The following figure shows the localized group for an application’s main nib file in the Groups & Files list.

You can inspect any of the localized variants individually or you can inspect the localized group as a whole.
To remove files from localization, select the files, open
the inspector, and click the Remove All Localizations button. Xcode
moves the files from the development region’s .lproj folder into
the folder for nonlocalized resources. Other localized versions
of the files are removed from the project but are not deleted from
the disk.
Adding Files for a Region
To add files for a region, select the file or localized group
for which you want to add another region, open the inspector window,
and click the Add Localization button. Xcode queries you for the
name of the localization region and copies the development region’s version
of the files to the new region’s .lproj folder.
Copyright © 2004, 2006 Apple Computer, Inc. All Rights Reserved. Terms of Use | Privacy Policy | Updated: 2006-11-07