-
Hands-on experience with editing for Apple Immersive Video
Join Clara and Ben from Main Course Films to discover how you can approach your editorial process when working with Apple Immersive Video. Learn about engaging with proxy workflows for efficient editing, as well as considerations in shot choice, sequencing, and sound design.
This session was originally presented as part of the Meet with Apple activity “Create immersive media experiences for visionOS - Day 2.” Watch the full video for more insights and related sessions.资源
相关视频
Meet with Apple
-
搜索此视频…
Hello, my name is Justin Beach, and I'm an editor working here at Apple in the immersive media format.
Let's see if we get the thing here. There we go. I started working in this format about three years ago. And in this intro, I'm going to share a few of the key differences that I've learned coming from the more traditional post-production. Now, an experienced editor is going to find that many of their tools and techniques are still applicable. However, there are a few key areas that are worth a little extra attention to make the best possible experience for our audience.
So the first area, the first pointer that you want to consider is the idea of audience gaze.
When we edit immersive video, we need to be aware of where our audience is most likely going to be looking within our full 180 degree frame.
This concept of audience gaze is a critical part of creating a smooth and invisible cut, which is something that we all want to do. In this example, we have two shots that we want to cut between. Shot A, we've just had a baby elephant cross the foreground from right to left. Given how cute this little baby elephant is, there's a pretty safe chance that our audience is going to be looking in this general corner of the screen. But when we cut to shot B, we see that we have actually placed our audience's gaze directly into this empty patch of dirt. This can disorient the viewer, making the cut feel abrupt and may even cause them to miss an important moment that you wanted them to see.
Now, if we change shot B to this shot of our main character, Benjamin, we see that we've actually placed the audience's gaze directly in the correct position for the incoming shot. This means that the audience does not need to spend time searching for the subject of your shot, and this reduces friction and makes a smoother cut.
Going along with audience gaze is the concept of audience curiosity. One of the joys of this format for the viewer is having the ability to fully explore the 180-degree frame. But this exploration takes time, and as editors, we need to account for that in the pacing of our cuts. This shot of hot air balloons in Turkey is rich with great visual details worth exploring.
The viewer will immediately be drawn to the fire of the inflating balloon. Perhaps spatial audio can be used to pull the viewer's eye to that spot.
From there, they may notice a man being dragged across the ground by a rope that's tied to the top of the balloon.
Moments later, they will look up to the sky and be captivated by the amount of flights that are happening in one area.
And finally, as our hero balloon inflates and rises, the viewer's gaze will be drawn up, giving them a surprise as another balloon passes within a few feet. Cutting away before the audience has time to explore all of these major landmarks will leave them feeling slightly cheated, and it will create an overall worse experience.
The third area of consideration is the concept of cutting with depth.
Because we are working with 3D footage, the audience's eyes must physically converge on subjects in our shots, just like they do in real life. Subjects that are far away, like the one in shot A, will cause the audience's eyes to spread apart. Subjects that are close, like the one in shot B, will cause their eyes to move together. Cutting between these two shots will require an enormous shift in the viewer's gaze. This pulling effect of the eyes can be uncomfortable for the audience, and it's something that should be given close consideration. Now, there is a better option.
Putting an intermediate shot in between the wide shot and the close up will slowly move the convergence point closer. That's just one technique that can be used to get around this point. And the final area of consideration that I want to share with you is dealing with compounding motion. Now, as you've probably heard many times in this presentation, moving shots always need special consideration to ensure that we are not making our audience feel any motion sickness. But the effect of multiple moving shots within an edit must also be considered.
In this example, we have placed a static shot. It's a very simple example, but we've placed a static shot in between two moving shots. This allows the audience to ground themselves and reset the perceived motion that they may be feeling.
If you are editing a piece that has a lot of moving shots, it is worth considering the placement of a few static shots to help reduce this compounding motion comfort.
So with that in mind, I'm going to hand it over to Ben and Clara from Main Course Films, who are going to give a more practical demonstration. Thank you.
Hi, I'm Clara Chong. I'm a director, writer and editor at Main Course Films and I edited both the two real world projects that we'll be showing you today. I'm Ben Allen, a producer, cinematographer and colourist at Main Course Films and I set up the post workflow for both projects and took them through the Apple Immersive and Spatial Audio finishing processes. So, we're excited to share with you our editorial workflows and techniques for Apple Immersive Video. Including the project setup in DaVinci Resolve Studio. Our edit processes where the technical workflow works together with a creative approach. How we conform the edit and get it ready for picture and sound finishing. How we extend our workflows for original music and foley sound design. These workflows have provided us with a smooth and efficient post-production process and a lot of creative freedom in our Apple immersive projects.
So our immersive journey began actually almost a decade ago on a project that was a drama action adventure family film for Sydney's iconic Taronga Zoo. The deep dive we did into resolution, motion, peripheral vision and perceptual scale actually gave us a huge head start in our journey on Apple Immersive. So editing in traditional cinema is such a powerful tool because it allows the viewer to see each moment from the best angle. But it also allows filmmakers to craft the experience with the best performances moment by moment and often from different takes. But it also allows for the expanding and contracting of time for both dramatic effect and for smooth narrative flow. Editing in Apple Immersive benefits even more from these techniques and the techniques of traditional filmmaking along with techniques from VR and from real life.
So editing is what the viewer allows to fully experience what we've dubbed the three P's of immersive inaction. So proximity, how close things feel, positioning, where they're placed and perceptual salience, what draws attention.
So the three P's of Apple Immersive impact on how viewers think and feel in ways that make the Apple Immersive storytelling a very different kind of journey.
One thing that we've found is that planning, and this has been a recurring theme over these couple of days, planning is key, even more so than it is in traditional formats. And what we've learned across each of our Apple Immersive projects so far is that proper planning before the shoot is really the first step in maximizing the success of your immersive edit.
So Apple Immersive is both a technical and a perceptual shift where the focus moves from what the camera captures to what the viewer perceives, both biologically and emotionally. And this represents a foundational shift in traditional cinematic language. For the edit, this means that Apple Immersive not only builds on the foundations of, say, stereoscopic and large format traditions, with many of the same rules and principles applying, there's also a point where those similarities end and a new creative language begins.
So Apple Immersive calls for heightened awareness of the audience's physiological limits and needs. And so the challenge isn't just to adapt old rules, but to begin the process of a new way of thinking about editing. Choosing subjects, stories and locations that are well suited to immersive storytelling is something that we've found makes a huge difference to everything that follows. So the wide range of work that’s been released today in Apple Immersive has been spectacular and exciting. But what we've uncovered is also the fact that this format excels in the simplicity of intimacy and authenticity. And it's these aspects that we wanted to explore further.
So through two very different projects, a drama and a documentary, we'll show you how we set up and maintain a smooth editorial workflow and process, and we'll show you that live in the DaVinci Resolve Studio timeline, and also explore how some of the principles relate to real-world editing decisions. So our first project is the documentary, The Fine Dining Bakery, about the inventor of what's known as the most Instagrammed cake in the world, master patissier Christopher Tay. And our focus here was authenticity and real spaces and using Apple Immersive to amplify truth and engagement.
Our second project is the drama, The Dobos Connection, about the quiet moments that change everything, starring Lauren Clare and Thomas Arcoy, and produced in collaboration with FX Guide and the University of Sydney's Motor Slab. Our focus was how the viewer perceives the sense of presence and emotion, and we wanted to plan sequences of shots to create cut points and editorial options so that we could maximise the authenticity of performance and the emotional intimacy through the power of editing.
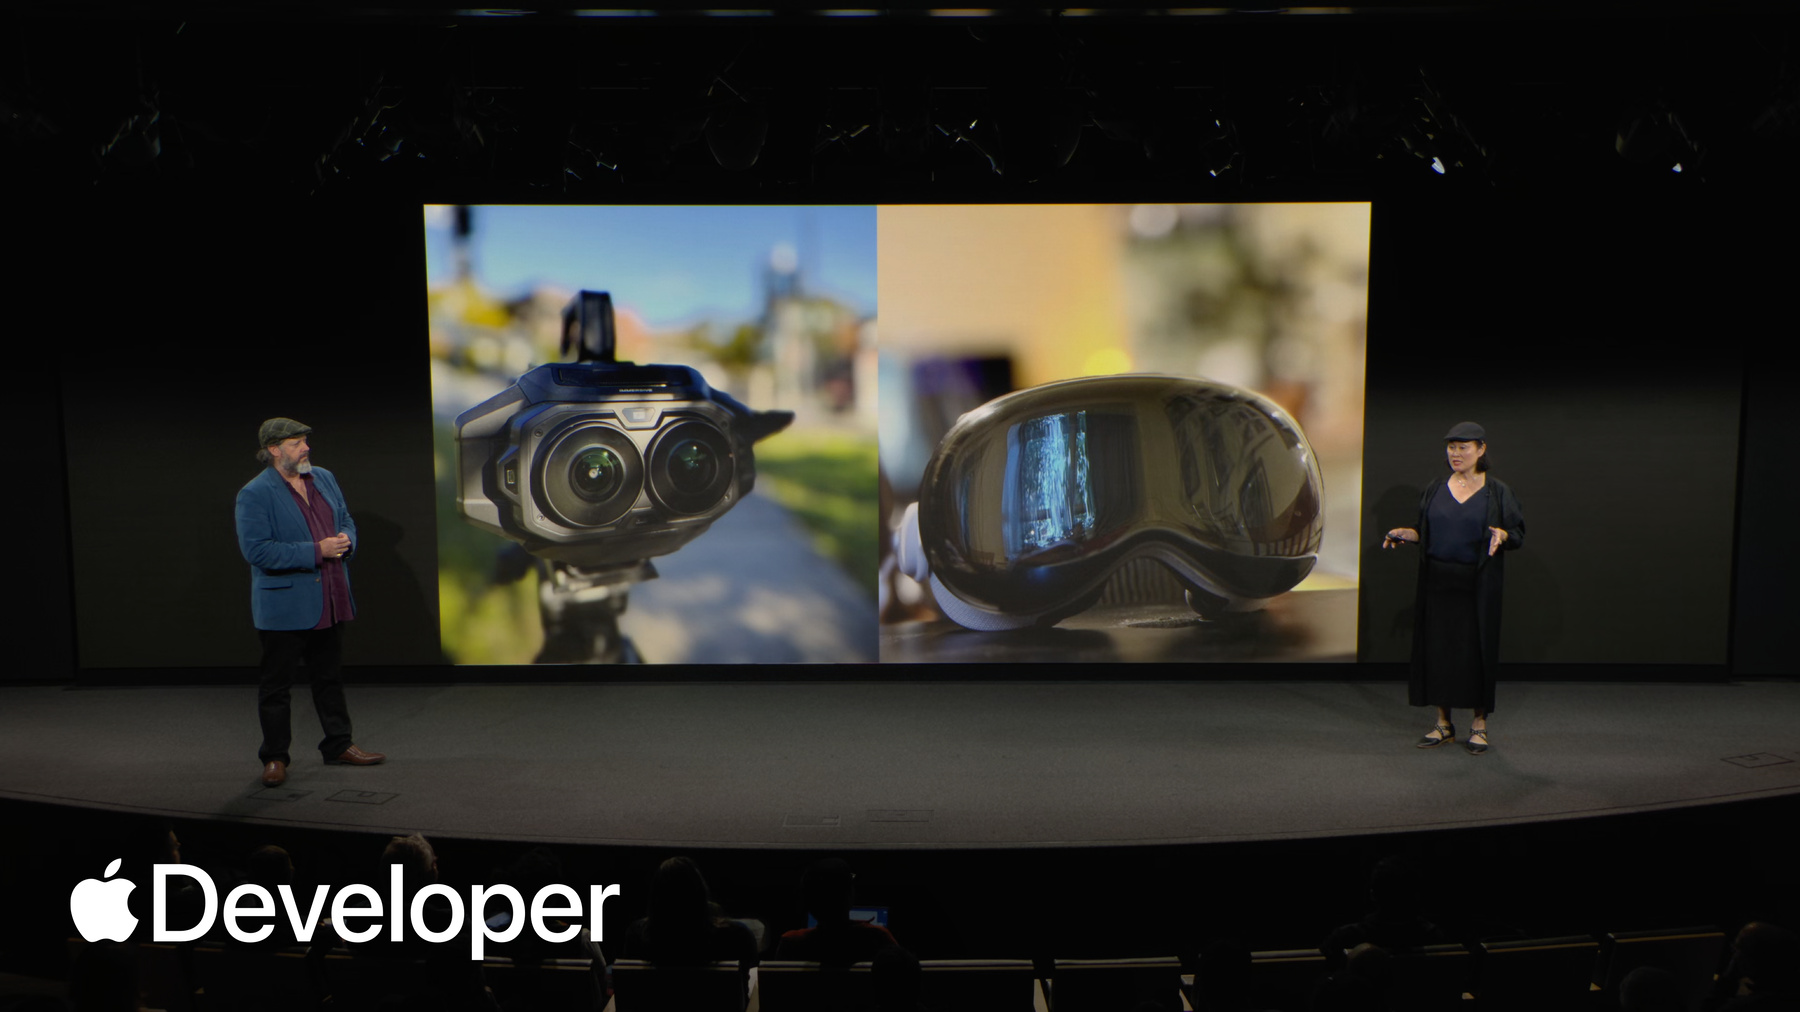
So both projects were shot entirely on the Blackmagic URSA Cine Immersive Camera and edited and finished in DaVinci Resolve Studio using the full Apple Immersive and Spatial Audio workflow.
We designed these two projects from the ground up to take advantage of the format, but also equally to push its boundaries. So we used the learnings from the documentary to then inform the approach to the more complex drama project. So let's now switch to the live feed from DaVinci Resolve.
Okay, so first we'll look at Project Setup. So you can see that in the Project Master settings, once Enable Apple Immersive Workflow has been selected, there are two resolution presets, the full camera resolution and a 50% option.
So the half res option can be a very effective working resolution. It dramatically reduces the processing workload for editing and also the render times for previews. And of course, Resolve makes it incredibly easy to switch back to full resolution for the final renders. It's also worth noting while we're here that the 90 frames per second requirement is an important part of creating a comfortable viewing experience in the Vision Pro. And it's not just a technical or aesthetic choice like it is in many other formats.
So the B-Raw immersive footage comes into DaVinci Resolve Studio pretty much just like any other 2D standard format footage. So the stereoscopic synchronization and alignment all happens with the camera with the factory settings and is built into each B-Raw file along with the ILPD projection mapping metadata.
As you can see here in the Fine Dining Bakery timeline, we're using the B-Raw immersive files straight from the camera. And you can see they're playing and skimming smoothly in the timeline despite the massive resolution, the two 3D streams, and 90 frames per second.
So we can switch to the special lat-long and viewport viewing modes. Let's grab those. So it's a lat-long.
And these are very helpful in working with and assessing the Apple immersive footage while working on a traditional 2D monitor.
Which also begs the question then, why do we even need a proxy workflow if it's so easy to work with the B-RAW footage? Well, if you have enough fast storage, very fast storage and lots of it, you might actually choose to do all of your editing natively in B-RAW at full quality. And if you're in a position to do that, absolutely, enjoy.
But for the way I edit, sort of flexibility and mobility are a priority. Because I'm juggling directing and writing duties, being able to edit whenever or wherever I can or choose to is very important to me. So this of course works better without external hard drives. So let's talk about proxy workflows. Our 10-minute drama, for example, generated well over 11 terabytes of data from a single-camera two-day shoot. So switching to a proxy workflow made it possible for Clara to edit entirely on her MacBook Pro with no external storage.
So with some experimentation, we settled on proxy settings of half res and the pro res proxy codec that provide a balance between the quality and the file size that we're comfortable with. Sort of detailed enough to judge micro expressions, but also still reducing the file sizes by around 90%.
So we've already prepared most of the proxies for this project, but wanted to show you a clip actually generating the proxy file so you can get a sense of how easily and quickly that happens.
So that's a full camera original proxy file generating there in a matter of seconds. And that's it.
So now that we have all of our proxies generated, we can show you how that's working by switching the proxy mode to disable all proxies. So we're only looking at the BRAW files.
And then Ben will rename that media folder to disconnect the original source media. And this will have the same effect Oh, you will? I will. I'm almost there.
So this has the same effect as if we had that media on a shared network storage or an external drive and then disconnected it from the edit machine. Every editor's nightmare, everything's offline.
But if we switch the project back to prefer proxies, suddenly everything's back in its proxy form and Clara can continue editing.
The really critical thing about letting Resolve use its automated proxy generation is that these clips actually still function as Apple Immersive. So if we look at the LatLong and viewport modes, these function exactly the same way that they did with the B-Raw originals.
So for my edit process, I find it very effective to edit in these two views, but also to use the viewer's zoom control to zoom in and out to see the fine detail of the big picture. And I actually found the edit process on both the documentary and the drama to be very different. The documentary was structured in a way that was more with a geometric focus, while the drama was focused on narrative with emotion and subtle nuance.
In Apple Immersive, where the viewer is looking at the end of one shot is where they will almost certainly be looking at the beginning of the next shot. So if we take this example, Chris here is in this position at the end of this shot, and if we look at the first frame of the next shot, that flows seamlessly through between those two shots. Now, that certainly isn't a requirement of the format, but it's a great way of creating a smooth visual flow, and it also means that the viewer needs dramatically less time to reorient themselves after each cut point.
So previewing edits in the Apple Vision Pro as work-in-progress renders, as you've heard, is an essential part of the edit process. So we do regular work-in-progress renders into the .arvu format that plays directly into the Apple Vision Pro, and this proxy workflow also maintains the critical Apple immersive metadata, including the ILPD for accurate projection mapping. So even though you can stream directly from the Resolve timeline to the Apple Vision Pro, I've personally found it more effective to work primarily on the 2D screen and do regular renders to play in the Apple Vision Pro.
So this allows me to work very closely to my normal edit process and critically to see the timeline and all the controls as I work.
So preparing to render the AIVU files for review in the Vision Pro is as easy as using any other render preset in the DaVinci Resolve Studio. You select the Vision Pro preview preset, and this applies all of the special requirements to create an AIVU package which will play correctly in the Apple Vision Pro.
So throughout the editing process, I found these renders invaluable, and as a result, probably did far more of these work in progress renders than I would ordinarily do for a similar project in a traditional format.
For example, because of the complexity and precision of the drama project, I ended up rendering over 70 work in progress ARVU files. Which I think is a record for you. It is definitely a record for me. And so because of this, I think it's really important to keep these renders really well organised and named.
And we're big fans of incremental version numbers, and you can see that Ben's setting up all the file name with the timeline name, including the version number, by using the percentage timeline tool, and then adding incrementing sub-numbers for each render output from that timeline version.
I think one thing that really surprised me about editing for Apple Immersive is that it's a lot harder to make certain judgement calls in the edit because you can become too familiar with the seconds of shots and then not get surprised by the changes in perspective. I think you can't unknow what you know and you can't undo the effect it has on your instinctive autonomous gaze and this for me was really different from traditional editing. So while you start to gauge what will and won't work in the Apple Vision Pro, it's really helpful to get feedback, actually, not just helpful, essential for me to get feedback from someone who hasn't watched the edit on the 2D screen and therefore doesn't know what perspective is coming next. So for example, we discovered through one of our regular work in progress renders on our documentary, version 3.6 of the Fine Dining Bakery, which we have open here in the timeline, that Clara had cut together a sequence of shots that inadvertently created a strong sense of spatial confusion.
The perspective, order and duration of shots can dramatically alter their effect on the viewer's mental model of the world. So you can see from this example that this sequence of shots would ordinarily play perfectly fine in a normal format and looks totally normal in this two-dimensional screen.
But when Ben checked the ARVU file of this version, he was instantly spatially confused by the sequence of shots which break down his mental model of the space. Now this happened even though I was familiar with both the footage and the location. And in fact, I was the actual person standing behind the camera for every one of these shots. And yet the sense of spatial confusion that I felt was profound.
So when we analyze this effect, what we discovered is the first shot faces one direction, and then the second shot faces almost the opposite direction. And then before the third shot changes back again, all the way back. So this became confusing because of the order of shots and the fact that the middle shot, even at six seconds long, wasn't on long enough for the viewer to spatially reorient themselves before the perspective changed again. So this need to spatially reorient with each new perspective in an edit before cutting to the next one is what we've discovered is one of the central requirements for editing in Apple Immersive. The bigger the change in perspective, the longer the viewer needs to reorient themselves to the next perspective.
And so in this case, I simply swapped the order of shots and deleted the third perspective, and this became a much smoother and continuous viewing experience.
So with this change to the edit, there was suddenly no spatial confusion at all, and the sequence became a smooth and seamless experience for the viewer.
For us, this really highlights how powerful each editing decision can be in Apple Immersive, and how big the differences really are when you really get it right.
So now that we've been happy with the edit, Ben can show you how he then conforms his back to the camera originals for finishing. So we'll disable proxies again. Yep. And we get to freak out again.
And you can see whether or not the source media is connected and then Ben will hopefully relink those files.
Nail biting suspense.
So I'm just relinking that to the renamed folder.
And it's messing with me. Let's try that another way.
Relink proxy media.
Sorry, relink full quality media. That's my fault.
There we go.
And voila.
So this functions in exactly the same way as if you were connecting to a backup drive from the shoot, a working RAID array, or shared network storage at your post facility.
So if these files are also available to the finishing system, then they're ready for handover to picture and sound finishing. And if they're not, you may want to do a resolve media manage to create a more portable version of the full quality files. Now, one of the really powerful things about the B-RAW codec is that it's designed specifically to be able to be trimmed without being converted. And so that means that these media managed versions of the footage have exactly the same picture quality and raw flexibility as the camera originals.
So the fact that the footage is also being kept in the original B-Raw immersive codec means that all the essential Apple immersive metadata is also being kept intact for the finishing and mastering process.
So these can then be used directly in the color, Fairlight audio and Fusion VFX pages. And the files can also be opened directly in the standalone Fusion Studio app or converted to other formats such as ProRes or EXR for specific purposes.
For the last five years, we've been using a fully integrated picture and sound finishing pipeline in DaVinci Resolve Studio, including two completed theatrical feature films. And bringing together picture and sound into a unified creative process has been just a wonderful way to work and a wonderful revelation for us. So this close relationship between picture and sound really reaches its peak with narrative drama.
So our drama project created significant editing challenges. The combination of a small number of characters in a real world location with a continuous narrative flow of dialogue and nuanced actions. It left hardly anything to cut away to and nowhere to hide edit sheets.
And this sequence coming up is another specific example which highlights the importance of the viewer's gaze and how we use choreography blocking to create new camera positions. So it's pretty much from this point here where she walks down into the two shot where they both look at the whiteboard.
Then we cut to a closer proximity over the shoulder of the two characters before we find a moment for her character in the narrative to walk away so we can then create close proximity cutaways of that sequence.
So Clara wanted the viewer in this scene to be able to read specific text on that whiteboard, which you can in the Vision Pro. And in conventional formats, it would have been as simple as a separate shot with the relevant text from the whiteboard filling the frame. And in immersive, because you can clearly see the whole whiteboard, even in a close-up shot, it was very likely that the viewer would miss the specific text that we wanted them to see while they were reorienting themselves and looking around in every direction. And because of the accurate depth perception and the one-to-one world mapping, looking over the shoulder of the two characters makes it easy for the viewer to understand what they're looking at, but then there's no colorways to move away to and so But because of that the viewer can instinctively and effortlessly know what they are looking at and therefore their eye is drawn to the specific text that has significance to the story. So we'll show you some behind the scenes iPhone footage of that scene in action and how we worked out the blocking to move the characters away from each other to create those cutaways. So this is behind the scenes iPhone footage taken during our on location rehearsals. So Clara wrote this script to explore the ideas of a subtle romance filled with nuance and emotion. And so rehearsing in situ allowed us to work out the movements very carefully with the actors to fit with the emotional beats of the script. But at the same time, it allowed us to do that in a way that created effective camera position opportunities and the potential for cut points.
Because the viewer is so tangibly aware of their position within the scene, the position of the camera, the planning of the scene really needs to create space within the scene for each required camera position in order for the viewer's perspective to feel comfortable within each shot.
So while the two-shot worked well for that moment of reading the text, it left very few options to actually get different camera angles that could intercut comfortably. So by picking that moment, that emotional beat for Lauren's character to step away from Tom's, we're able to make space for camera positions that would allow intercutting drama coverage of single close proximity shots while enhancing the emotional impact of that part of the scene.
And so this allows all of the techniques of traditional drama editing, but in a way that's comfortable and seamless for the viewer inside the immersive world.
In the same sequence, we also discovered another big learning about dialogue across intercutting shots.
The ultra wide shot in this sequence was incredibly useful in bridging moments between the close proximity shots. But it led to this question that we needed to answer before we could lock off the edit, which was what happens in the spatial mix to the position of dialogue if a cut point happens within a line of dialogue.
So you can see here if I switch to the Fairlight page and select the correct track, you can see here the green crosshairs which are the position of the sound of her dialogue track that she'll step into before she has the first line of dialogue. Now, the obvious and logical choice is that in each shot, the voice should come from the position of the character. But what was really strange was when we played this back, it felt wrong. And it was powerfully unsettling watching that in the Vision Pro, even though it wasn't immediately obvious to us what the cause of that was. So for example, when Clara actually previewed this version, she knew that something was wrong, but asked me if I'd used the wrong take of the wide shot in the conform. Another member of our team looked at it and said the wide shot was very jarring at this moment, maybe it was wrong to cut to the wide shot at that point. So Ben experimented with a version where the voice positioning from the close-up is held in the wide shot. And what we realized was happening was a form of cognitive dissonance where the brain couldn't match the change in position it was hearing in the audio with the image of the character standing still.
So like the spatial confusion shots of the fine dining bakery, in this case it was a change of position and then quickly back again that created the dissonance. So by maintaining the dialogue position across the brief wide shot, the dissonance was avoided and the sequence now plays smoothly and comfortably for the viewer.
So despite how illogical that seemed, it now becomes a seamless effect for the viewer. Another technique which we discovered the importance of on this project was cutting mid-action.
It's a classic technique but with far more importance in immersive because it helps the viewer intuitively understand that this is continuous action, which then helps them maintain their mental model of the world.
So this next sequence is behind the scenes iPhone footage.
So this is the scene that we're talking about. And this is actually the most challenging sequence of both projects to shoot and edit. So the simple action of Lauren's character locking herself out of her office and then seeing her security pass through the glass was a lot harder than either of us had anticipated. So in a traditional format, you'd simply get a clean cutaway close-up of the security pass, and you could see both what her character was looking at and cut around the other action for timing. But in Apple Immersive, these techniques don't apply. So part of the solution was to cut on the action of her picking up the cake to motivate a change in perspective from inside the room to outside the room, where we could see what she was looking at.
So to break that down, Clara ended up cutting from this wide shot of inside the room, which doesn't look as dark in the Vision Pro, that's another thing worth noting, to over the shoulder as she stands back up with the cake, bridging that gap with the action, and before cutting back inside to this moment of her seeing her security pass locked inside the room.
So cutting mid-action helped the viewer to comfortably and again seamlessly understand the continuous flow of the action while still seeing the crucial story elements.
So one final consideration for editorial in Apple Immersive is workflow for music and foley. Almost all other audio software is only compatible with standard frame rates and resolution, so can't import Apple Immersive at 90 frames. So we originally started with rendering a 2D QuickTime at 90 frames and then bring that into a new 30 frames standard project, maintain the lens space view for the fine dining bakery.
So by the time we got to the Dobos connection, we realized that we could actually use the lens correction tool in the edit page of Resolve to do a very rough undistort of the picture. And then we could also use Resolve to create two views of the same image, which allow our composer and Foley artist to work with a full image so they could see the whole picture and when things enter and leave the image was a crucial part of that. But then the zoomed in view on the right that gives you more detail to see critical action, which was also crucial in interpreting what the actors were doing. So we then use Resolve's burn-in to do the source time code, which is giving us a version of the 90 frames per second time code relating back to the original timeline. And then the REC-TC is giving us the 30-frame conversion of that that relates to the composer and the rest of the audio team's audio workstations at 30 frames a second.
Okay. So... We want to show you this big on screen. This is our composer, Carlo Giacco, working at his workstation. You can see the two-view image there on his screen.
That was really effective for him to work with. It allowed him to work basically as if this was a normal format project and it just dovetailed into his normal systems. But he had these two views so that he could get the full picture and then the critical detail as well.
And because it was able to fit within his existing system, it was a very smooth workflow there. But then because also we had the reference to the 90 frames per second time code as well, that was able to feed seamlessly back into our Apple Immersive Finishing Pipeline with the spatial audio. So both of our projects have been invaluable explorations into the new concepts and ideas of editing for Apple Immersive. So they've helped us confirm some theories, but also discover some truths that inform some of the new grammar of this medium. And that could only be learned on real projects. So if we can leave you with a few key thoughts. First of all, B-Raw Immersive in DaVinci Resolve Studio automatically handles most of the challenges, the technical challenges of immersive and stereoscopic. The next point is don't be afraid of proxy workflow. It makes things really easy.
Be prepared to do many more work in progress renders than you would normally do. It's so important to then check them in the Vision Pro. So part of the new grammar of editing revolves around the three P's of Apple Immersive in Action.
The viewer is the camera. And because of that, it's necessary to create space for them within the room and within the scene. And finally, because of this spatial awareness, the viewer needs time to reorient themselves before any change in camera position.
So we hope this has given you some food for thought in your own Apple Immersive editing journey.
And a little plug, if you found our tips helpful, we're excited to announce we have a book, Cinematic Immersive for Professionals, The Creative and Technical Guide to Planning and Filming for the Apple Immersive Video Format. This is going to be available through Apple Books very soon. Thank you, everyone.
-